Notifications

I have been torch firing for a few years, but just acquired a small kiln which didn't come with any shelves. I am just looking at buying supplies for the kiln.
I am making some irregular shapes, like a crescent moon, that sit precariously on my trivets. I have noticed kiln paper and kiln fabric, and am wondering if I can place the counter enamel side down flat, once fired, on either of these materials without messing up the counter enamel?
Any advice is welcome.
Hi Robbie,
There are a few things you can do, but to get by with a clean counter back, I would suggest slightly doming your metal and sanding the piece on a hard surface to get your edges a little wider - this way only the edges will touch your flat trivets - you can also sit the piece on Mica - but it does have a tendency to stick - there is also the kiln fabric - but once the enamel begins to melt it will stick to anything - so dome your work -
If you will be hiding the back of the piece and no one will see it, you can put a coating of scalex on it. Then you can fire the front while the piece is on kiln fabric. (But first follow Trish White's excellent advice, doming will make your piece stronger and less prone to warping.)
If you place the counter enamel surface directly on oven paper or oven tissue, after firing, some of the paper or fabric will always stick to the counter enamel. Both can be easily sanded down. To dome the pice is a good idea, not only to prevent the counter enamel on sticking to the support, but also to strengthten the piece. Next this, convex domed pieces are much easier to sand then flat pieces
Edmund
Thank you all for the suggestions!
I am making pendants so I was hoping to make the pieces flat (and no other metal work or supports with it). So the back can be seen. I guess I'll try the Scalex and see what the appearance is like.
And I'll try one with slight doming too.
I can assure you the scalex will give you the ugliest look EVER. Scalex is only to be used if no one will see it. If I wasn't clear about that, my apologies.
Version:1.0 StartHTML:0000000168 EndHTML:0000002012 StartFragment:0000000435 EndFragment:0000001995
Hallo,
David is RIGHT!!
I do not want to ride around on the doming of pendants. But the doming has, in addition to the advantages already described the further advantage that, in contrast to flat pendants, domed pendants do not stick to the bare skin, what is especially in summertime awkward.
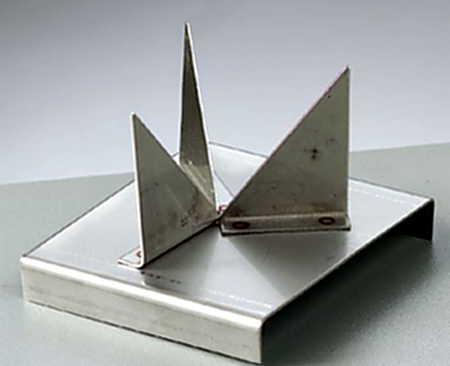
 Abbildung 1: Three wing support
If you want to enamel small, flat objects I recommend you some three-wing stand supported. On such stands almost all small forms, whether round, angular or irregular, are very safe supported. These supports are available in different sizes at every enamel retailer.


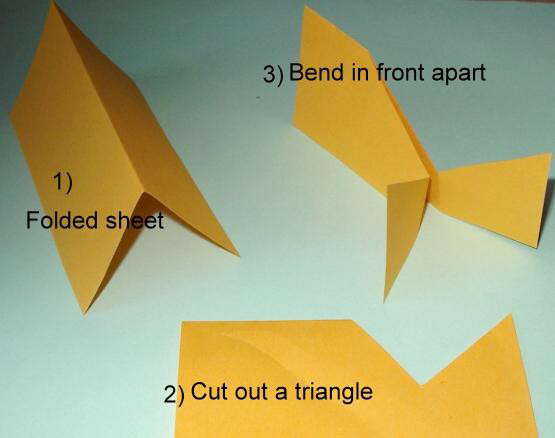
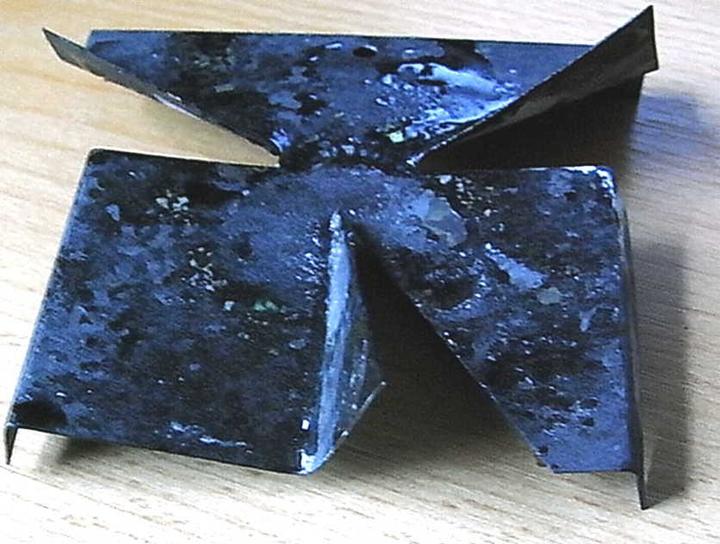
By these Pictures above you can make such stands but also yourself. It is important that you make the stands from scale-free, about 0.4 - 0.5 mm thick stainless steel sheet. Iron, steel, copper brass are unsuitable.
Happy enameling
Edmund
Hi Robbie,
I think you will have to use a trivet so that you have a perfect back - the Scalex will not help you - look into buying small trivets and also dome your pendants - they have more dimension than flat! it doesn't have to much of a dome - you do not want ugly backs!!
Thanks! I hear you all. i will have to work out a good trivet system and find some stainless steel to make my own.
This is a very interesting discussion. I have never domed my pendants. To do so, should I dome before I use counterenamel. I guess the answer is yes, as the enamel would crack otherwise if I domed after.
Also some people fire both sides of metal at the same time. How to do this?
Mary Rose
Yes, you must dome the parts before enameling.
Anneal the work piece and quench in cold water. As a result, copper and silver sheets are softer and can be better deformed.
Remove the work piece from the water and dry it.
Remove the scale and place the work piece in a dapping block and dome it with a mallet.
If the doming is perfect, the back of the work piece can be enameled.
For round work pieces, the edges of the work piece lays after arching on a flat surface smooth on. That's OK. This is not the case with oval, rectangular or irregular contours of the work pieces. So that the edges of such forms rests flat on a plane surface, the edges are leveled with a rubber hammer or a ball hammer. That gives the work piecees a better look.
The simultaneous, double-sided enameling of a work piece is quite simple.
Clean and degrease both sides of the work piece thoroughly.
Spray with a water spray bottle one side of the work piece thinly with glue water. The surface should not be too wet, just damp.
Sieve a thin layer of enamel on.
Then spray again and sieve a new layer of enamel on. Repeat the procedure a third time.
Place the work piece on the warm kiln until the enamel layer is completely dry.
Allow the work piece to cool slightly. If you transport the piece, hold it with you fingers, or a plier only on the sides
Then work the front of the work piece as well as the back. (Glue water-enamel-glue-water-enamel etc.
Place the work piece on a tripod, place on the oven and dry.
Put the piece of wood in the oven for firing.
Watch the fire.
Once the surface of the enamel has melted out smoothly and shines, remove the work-piece from the oven.
Instead of sifting the enamel on, you can also apply it wet.
Stir enamel powder with glue water to a honey-like consistency. The water-enamel mixture must not contain too much but also not too little glue water. If the emulsion is too thin, it will drain from the workpiece. If it is too thick, it can not be distributed on the surface. Here you have to experiment a little.
Apply this emulsion about 1-1.5 mm thick to the workpiece.
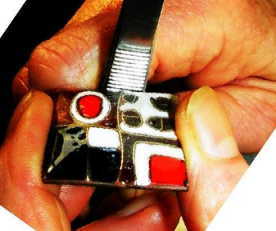
 In order for the mixture to spread well over the surface, hold the work piece with two fingers and rub with the holding surface of a pair of tweezers up and down at the edge. The vibration distributes the enamel evenly over the surface.
The excess water can be sucked off with a paper towel.
Place the workpiece on the warm kiln to dry.
If the enamel layer is dry, the second side is processed.
Glue-water or holding agent.
For more than 60 years I have been using traditional wallpaper glue for all gluing techniques, whether gluing cloisonné wires, holding enamel powder on steep surfaces or applying wet enamel into cloisonné cells.
Add some distilled water to a teaspoon of the wallpaper-glue-powder to make a thick pap. The pap lasts for several weeks in the fridge.
To make the glue water, add 5-6 drops of the wallpaper-glue-slurry to a spray bottle containing about half a liter of distilled water. Shake the mixture a bit. The glue water is ready.
Dear Mary Rose,
here is an answer to your question which I have written yesterday late night. I hope this helps initially. I hope that I come to that, to make some ilustriation fotoprints soon, because "pictures says more than thausends of words". At the moment I am to much in stress to make the fotoprints
Friendly
Edmund
Edmund, thank you for your informative reply. I believe you have given me all the possible information there is on this subject in an easy to read format. I appreciate your thoughtfulness and your knowledge.
Sincerely, Mary Rose
You can put flat piece on the mica sheet for firing with counter enamel on the bottom. It will fire just fine. Mica in general doesn't not stick to the enamel. If a few particles left - just rub them off under water. I did it multiple times. I use counter enamel from Pam East. It's like a cement, you apply it as a paste, then dry - and it will stay in place even you turn the piece.